
Cooking with Apples

I had originally planned to focus on apples for only a week but The Buddy enjoyed a couple of the trays so much that there were a few left unexplored.  Instead of rushing on to the next thing I decided to do a second week of Apples which put the remaining trays to use, and allowed us to do a little cooking.

On Monday we made apple cake (following this recipe with just a few adjustments: substituting applesauce for the oil & cutting the sugar in half). 
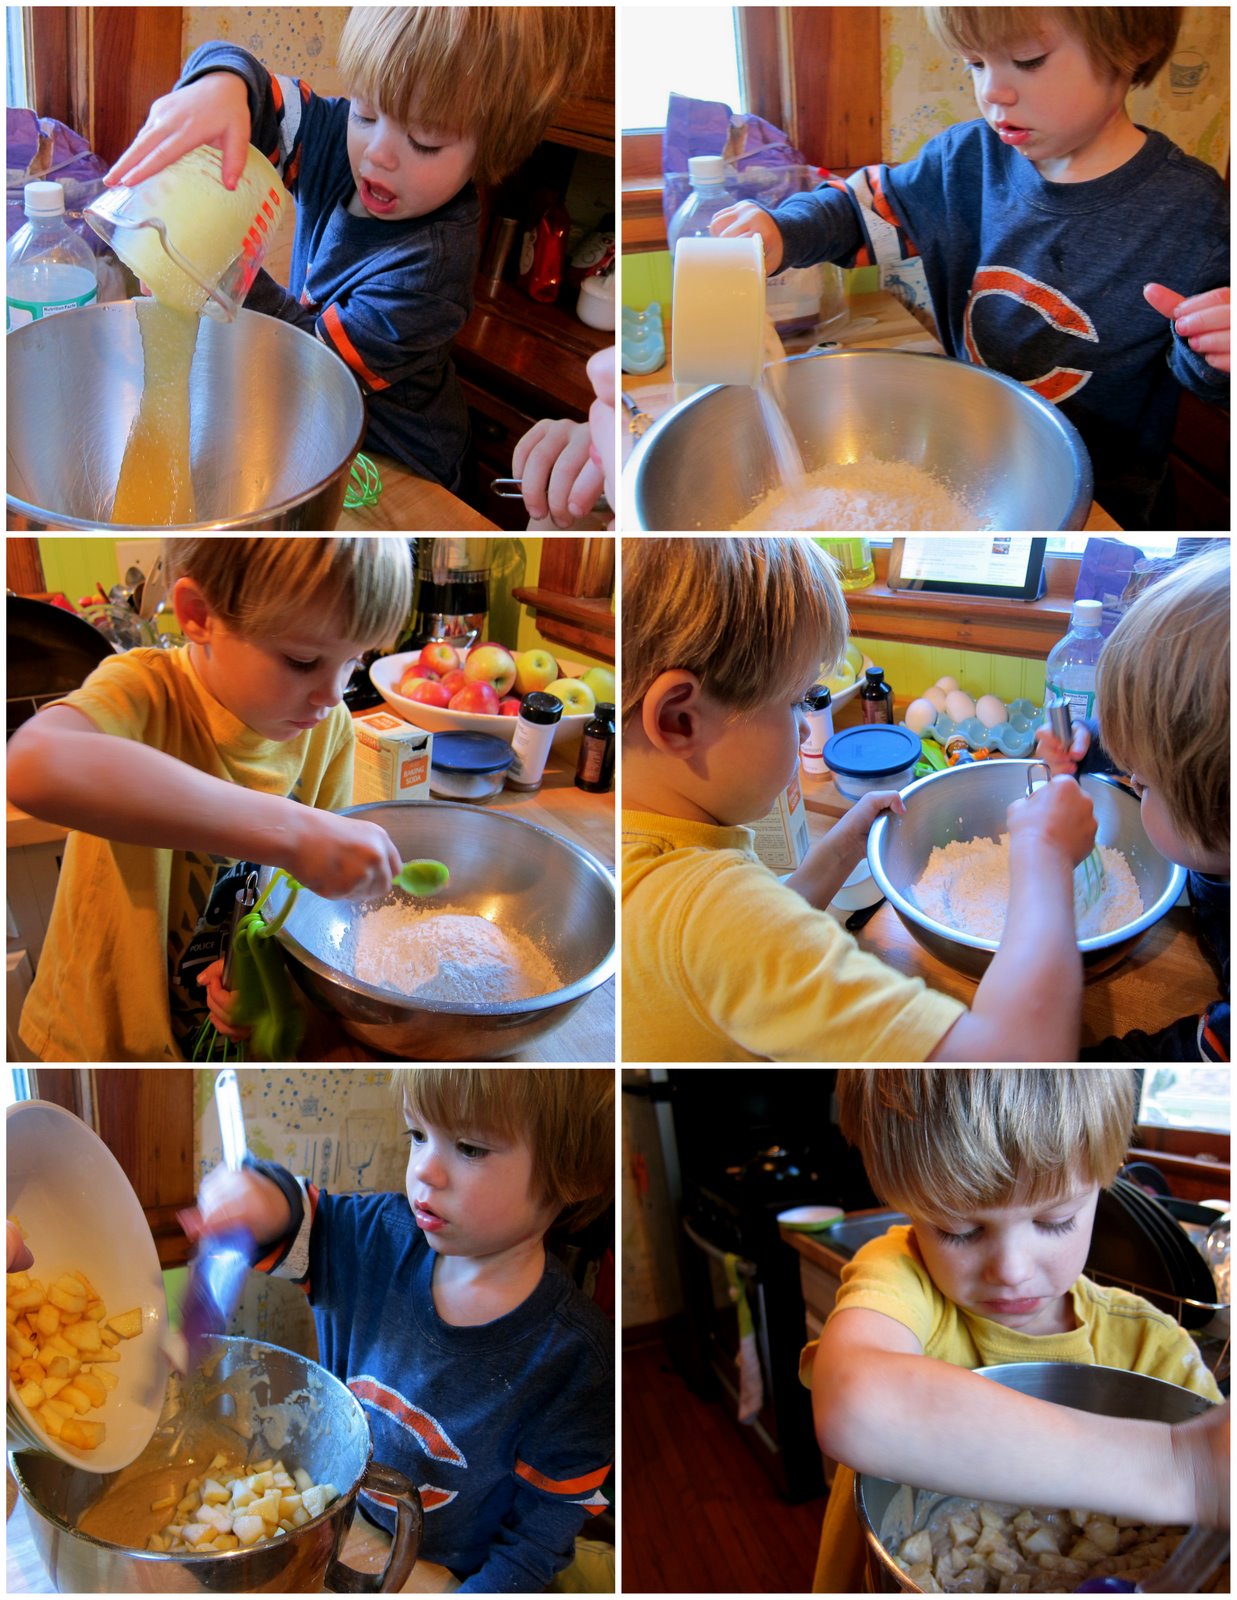
Even with the measurements not being quite exact (Mini Man is a very charismatic pourer) the cake turned out wonderfully. If you make it I highly recommend topping it with some homemade caramel.   
The Buddy wasn't sure about the texture of the apples but Mini Man loved every bite...too bad for him Mommy and Daddy ate it all before he could have seconds. 

On Wednesday we made applesauce. We didn't use a specific recipe but instead worked from memory, referencing a Sid the Science Kid episode.  (I'm not a huge proponent of television/movies - our best days are when we don't watch anything - but there are those days when I need the kids occupied for a little while and for that I would highly recommend Sid.) 

Both the boys enjoyed the applesauce - a big victory because The Buddy won't eat the store bought stuff, he thinks it's baby food.  
We had plans to do some more cooking tomorrow ( I want to try this recipe) but the weather is suppose to me so nice that I think we may meet some friends at a park instead...soon the snow and cold will be against us.

Comments

  1. yummO! apple cake is one of my hubby's favorite!

    ReplyDelete
  2. Oh wow! I just put an apple cake in the oven! Wish had seen your recipe... will make this too, as have LOADS of apples from my friend's garden to use!

    Thanks for linking to Kids Get Crafty!

    Maggy

    ReplyDelete
  3. PS I NEED A RECIPE!! EVEN A VAGUE ONE! :-)

    ReplyDelete

Post a Comment

Thanks for taking the time to leave a comment - you make me smile :)

Popular posts from this blog

A Little Red Cardboard Barn

We've finished our farm unit and are moving on to a new theme tomorrow - but before we do I wanted share the barn we made. The wooden farm animals came with a beautiful handmade ark that we gave Big Buddy for Christmas a couple years ago.  I would someday love to have a wood barn but it's currently not in the budget. So in the mean time we decided to improvise and make our own.  I stumbled upon this perfectly sized milk box (4 gallons per box) while subbing and thought it would be sturdy enough to handle play. Hubandie and the boys used an x-acto knife and wood glue to build a barn shape. to get the doors to fold out hubandie used an x-acto knife and scored the inside of the cardboard We then painted with a basic primer and outlined a window and a door with painters tape. cardboard is very porous so priming is a must if you want decent coverage Big Buddy however insisted that we add more windows so it looked like the barn in our book The Big

Preschool Syllabus: Dr. Seuss

Normally I'd do a Dr. Seuss unit in March around his birthday. We had to do one now though because on Saturday Big Buddy and I going on a date to a  Dr. Seuss exhibit . The exhibit is only at the museum until January and I'm afraid if we don't go now we might not get the chance. We are of course reading lots of Dr. Seuss's books. A great advatage to studying Dr. Seuss in November rather than March is that all his books were available at the library. I also found a great children's biography which is perfect for preschoolers. Pebble First Biographies: Dr. Seuss  We've read it a couple times and Big Buddy loves reciting all the facts he's learned WRITING CENTER ADDITIONS big buddy's name in sand paper letters, coloring pages  & mazes from seussville.com skills practiced: fine motor, letter recognition, creativity,  reading comprehension LEARNING "TRAYS" -   I rotate these, setting out about four a day from which the boy&#

Jack-O-Lanterns on the Fridge

Last fall I saw the idea for refrigerator pumpkins with face pieces in FamilyFun Magazine  and have been anxious to recreate them ever since. It was pretty quick and easy and since the only thing we didn't have on hand was magnetic sheets ($1.50 with coupon at Joann's) it was also very cheap. my supplies: magnetic sheets, orange & black construction paper, white pen, tacky glue *i know they have self adhesive sheets but my Joann's didn't carry them   glued (very messily) and ready to cut Both the boys were quite enthused when they discovered them after rest time :) Hopefully it will keep them entertained until we carve real pumpkins.