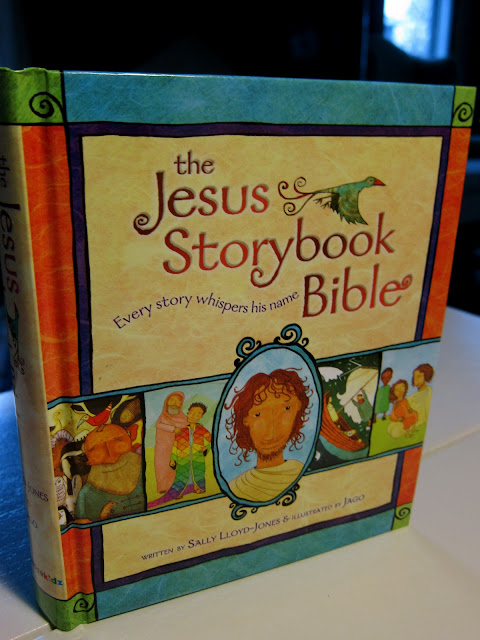
One of the Christmas traditions we want to share with our children is an Advent Calendar. We looked at several but didn't find any that were quite right: attractive, inexpensive, and Christ-centered. Finally, we decided to just create our own. We liked the idea of a Jesse Tree so we started with our favorite children's bible.
Husbandie, who is uber talented, scanned a picture from the first 24 stories (Old Testment and Jesus's birth & baptisim) and created a sheet of "ornaments".
*UPDATE* A reader kindly pointed out that we skipped one of the stories, "The Girl Know One Wanted" and instead included two ornaments for "A New Beginning". The mistake has been corrected we have also added numbers to make using the ornaments easier.
We have also added a second option. Our family starts with the story The Beginning a Perfect Home and ends with Heaven Breaks Through. We do this because while the The Story and The Song is beautifully written it is an introduction to the book and not specifically based on scripture. We also like that our advent doesn't end with a baby but the reason for why Christ came. We feel that ending with Heaven Breaks Through emphasis that he is Immanuel - God with us! We also like ending on the words "The great rescue has begun." We, however, understand and respect that some families may want to do it differently and so we've added a second option and you can now print ornaments starting with The Story and The Song and ending with The King of all Kings.
 |
| click here for the ornament pdf |
We then adhered the ornaments to a magnetic sheet and cut them out. Husbandie designed them to fit perfectly in the bottom of a mini cupcake pan.
 |
| muffin tin via wal-mart ($4.50) |
We wanted the tree to be close in size to the calendar, a cookie sheet was a perfect solution.
 |
| $ 4 dollar cookie sheet via wal-mart and sally hansen nail art pen |
 |
| i love watching him draw, #hotness |
 |
| finished tree and ornaments *i painted over the tree with mod podge to provide a protective layer* |
Now for my favorite part, making the actual calendar.
 |
| our supplies: scrapbook paper ( cut in to 24, 2.25" squares), scrapbook embellishments, self adhesive magnetic paper, glue ( i used mod podge), and a good pen *i bought all our supplies at michaels using 40-50% off coupons - the total came in around $9* |
The design options are limitless. The only suggestion I have is to start with three coordinating papers, this keeps things visual interesting and cohesive at the same time. Other than that, just have fun. We were blessed with two new nieces this year so we made each of their families a calendar.
 |
| our iowa neices' calendar |
 |
| our indiana niece's calendar *for the third paper & flowers i used an old hymnal* |
 |
| our family's calendar *i made this for our family last year* |
We are super excited to begin the Chrismas season at our house. I'll be sharing more of our traditions in the weeks to come and I'd love to hear about yours.
What a great idea and fun way to do an advent calendar! Stopped by from For the Kids Fridays and so glad I did. I am pinning this!
ReplyDeleteSierra @his4homeschooling.blogspot.com
Love those! Great idea! I really like the one using the old hymnal...I'm a sucker for things made with sheet music. Thanks for linking at Shine On Fridays!
ReplyDeleteWhat a wonderful idea! Thank you for sharing it at Crafty Moms Share!! I know we love our advent calendar. A couple of years ago, my parents gave us a beautiful wooden one with the nativity painted on it. Each day has a door to open. This year I'm hoping to make a needle felted nativity to put in each day for my daughter to open and discuss the story with her.
ReplyDeleteThis is waaaaay cute! What a cute & creative idea! I am your newest follower! I'd love for you to follow me back, if you want to. I'd also love for you to come link up at TGIF Linky Party - http://livinglifeintentionally.blogspot.com/search/label/Linkey%20Parties or enter to get one of my first ever guest posts that I'm offering up during the month of December.
ReplyDeleteBeth =-)
What wonderful idea! I love your advent trays!
ReplyDeleteThis is such a lovely idea! definately pinning this...
ReplyDeleteHow fun! I would love it if you wanted to link this up at my link party going on right now! This is so fun!
ReplyDeleteHope to see you there!
Kirsten
www.mushkiloves.com
Love this!!! fantastic idea!!!!
ReplyDeleteI love the one you made for your indiana niece
Thanks for linking up to Serenity Saturday!!
Hope to see you there again tomorrow!
www.serenityyou.blogspot.com
Natasha xxx
What great Christmas gifts! I love that your talented husband is so involved in your family traditions as well! I added your post to my December 2011 Family Activities post at http://livingmontessorinow.com/2011/11/29/december-2011-family-activities/
ReplyDeleteThanks for stopping by and linking up at Mushki Loves! I am your newest follower!
ReplyDeleteHave a great day!
Kirsten
Wow, what a talented family. I love this idea and I love that it is a family project too. It is always good to remember the Reason for the Season!
ReplyDeleteI am hosting an Advent calendar link up as part of my 12 Days of Christmas series at my Christmas blog. I sure do hope you can pop by and link up this wonderful post!
Best Christmas wishes,
Natasha.
Awesome job!! Thanks for sharing at Shine on Friday. We hope you'll join us again today.
ReplyDeleteAs I already said, I love love love this idea! I pinned it and am also hoping you would like to share it at my advent linky party. I didn't have time to make one this year, but I would love to do this next year.
ReplyDeletehttp://his4homeschooling.blogspot.com/2011/12/christmas-book-advent.html
I love how you have tied Christ into your advent calendar. What a great gift! Thanks for sharing on Monday Madness.
ReplyDeleteThis is amazing! Not only are they beautiful, but they are unique as well.
ReplyDeletei love this, and want to make jesse tree type ornaments to use with our Jesus storybook bible. question though: why are there two pictures from the ark story? it really makes it only 23 stories....and skips two on the way (the story and the song, and the girl no one wanted)
ReplyDeleteThank-you so much for taking the time to write and point out this mistake! We noticed it last year when we were doing the calendar with our own kids and then completely spaced on fixing it. The 2nd A New Beginning ornament has been removed and an ornament for The Girl No One Wanted is now included. The pdf link above has been updated.
DeleteWe did not include The Story and The Song because it's not a scriptural story but instead the author's introduction. There are 24 ornaments/stories meant to be used Dec 1st to Dec 24th.
Thank you for fixing it! printing out now:)
ReplyDeleteHi, this is beautiful. I am certainly going to use your idea but it will be with a Chinese student living with us in Australia who has never known Christmas before. How beautiful to be able to share redemptive history with her.
ReplyDeleteI have a question: why the muffin pan and the tray? I'm not sure how you use them...
thank you
Janelle
Janelle,
DeleteYou don't have to use the muffin pan and tray. We just put those together to make the the advent count down a little more fun/festive for our kids. We put a circle/ornament in each muffin hole and then cover them with the square cards. I made this so the kids have something to "unwrap". We stuck the printed ornaments/circles on an adhesive magnet sheet so they stick to the pans. I think you can see in the pictures that my husband drew a tree on the cookie tray so after reading each story the kids then stick the ornaments on the tree.
If you wanted to keep it simple you could just print out the ornaments/circles and hang them on anything ( a piece of paper) as you read through the stories.
Hope you have a wonderful Advent season.
Rachel
I'm getting an error every time I click on your ornament pdf link.
ReplyDeleteIt's working now!
ReplyDeleteThank you so much for preparing this for us. We use this bible and are using it for the Advent Season. I used these circles to do glass tile magnets to use on our advent calendar. I know things like take lots of time to prepare. Thanks for sharing it with us, for free, here!
ReplyDeleteThis is great! I was wondering if images #22 and #23 were from the same reading day (day 23)? I have the word printout for the advent with the Jesus Storybook Bible and the numbers still don't seem to match. Thanks so much.
ReplyDelete#22 goes with "Light of the World", #23 goes with "The King of All Kings", and #24 goes with "Heaven Breaks Through". Hope that helps.
Deletedo you have a list of the stories?
ReplyDeleteWe changed the pdf a little bit so the top now tells you were to start and finish. We also added a second option for families who may want to do it a little bit differently than us.
Deletefor the some reason 'the story and song' ornament won't print at all for me...
ReplyDeleteLaura, so sorry to hear that it isn't printing for you. Here is a direct link to the google documents pdf, you should be able to print it from there. If that doesn't work, email me at joyfullyweary@gmail.com and I'll send it to you as an attachment. https://drive.google.com/file/d/0B1K0U__XJHeYR3BqRW5rMnE3T2s/view?usp=sharing
DeleteThese are just amazing! We actually use the exact same book, so THANK YOU Kindly for sharing this idea! What a GIFT! Happy Holiday Season!!! :D
ReplyDeleteIsn't it a great Bible!? It makes happy to hear that someone else can get some use out of them too.
DeleteI'm new to advent calendars and I feel like I'm missing a connection. How do you connect the tree cookie sheet with the storybook ornaments with the other cookie sheet that has the calendar? Is the tree/ornament hidden underneath the calendar? Where does the muffin tin fit in?
ReplyDelete