We've made a few changes to our schoolroom since the last tour post. I meant to blog about the changes back in September but we were still finishing up a few things and by the time they were done, school was already in full swing. The room gets a ton of use and doesn't stay tidy for very long. It's sort of situated between are living and dining room with open doorways to both so it's never closed off. In addition to school, the kids also use the room for crafting, games, puzzles, etc. We are blessed to also have a playroom in our basement so most of the pretend and active play happens down there. Even so, this room takes a beating.
If you saw our previous tour you've probably already noticed we traded the storage ottomans in for chairs. I noticed that having a seat with a back helps Big Buddy stay focused. We already owned two of the chairs and Jeremy's mom gave us the other two. We still keep a couple of the ottomans in our schoolroom for extra seating and because they are great for storing newspaper or for reaching high shelves. The rest of the ottomans are being used in bedrooms or the playroom.

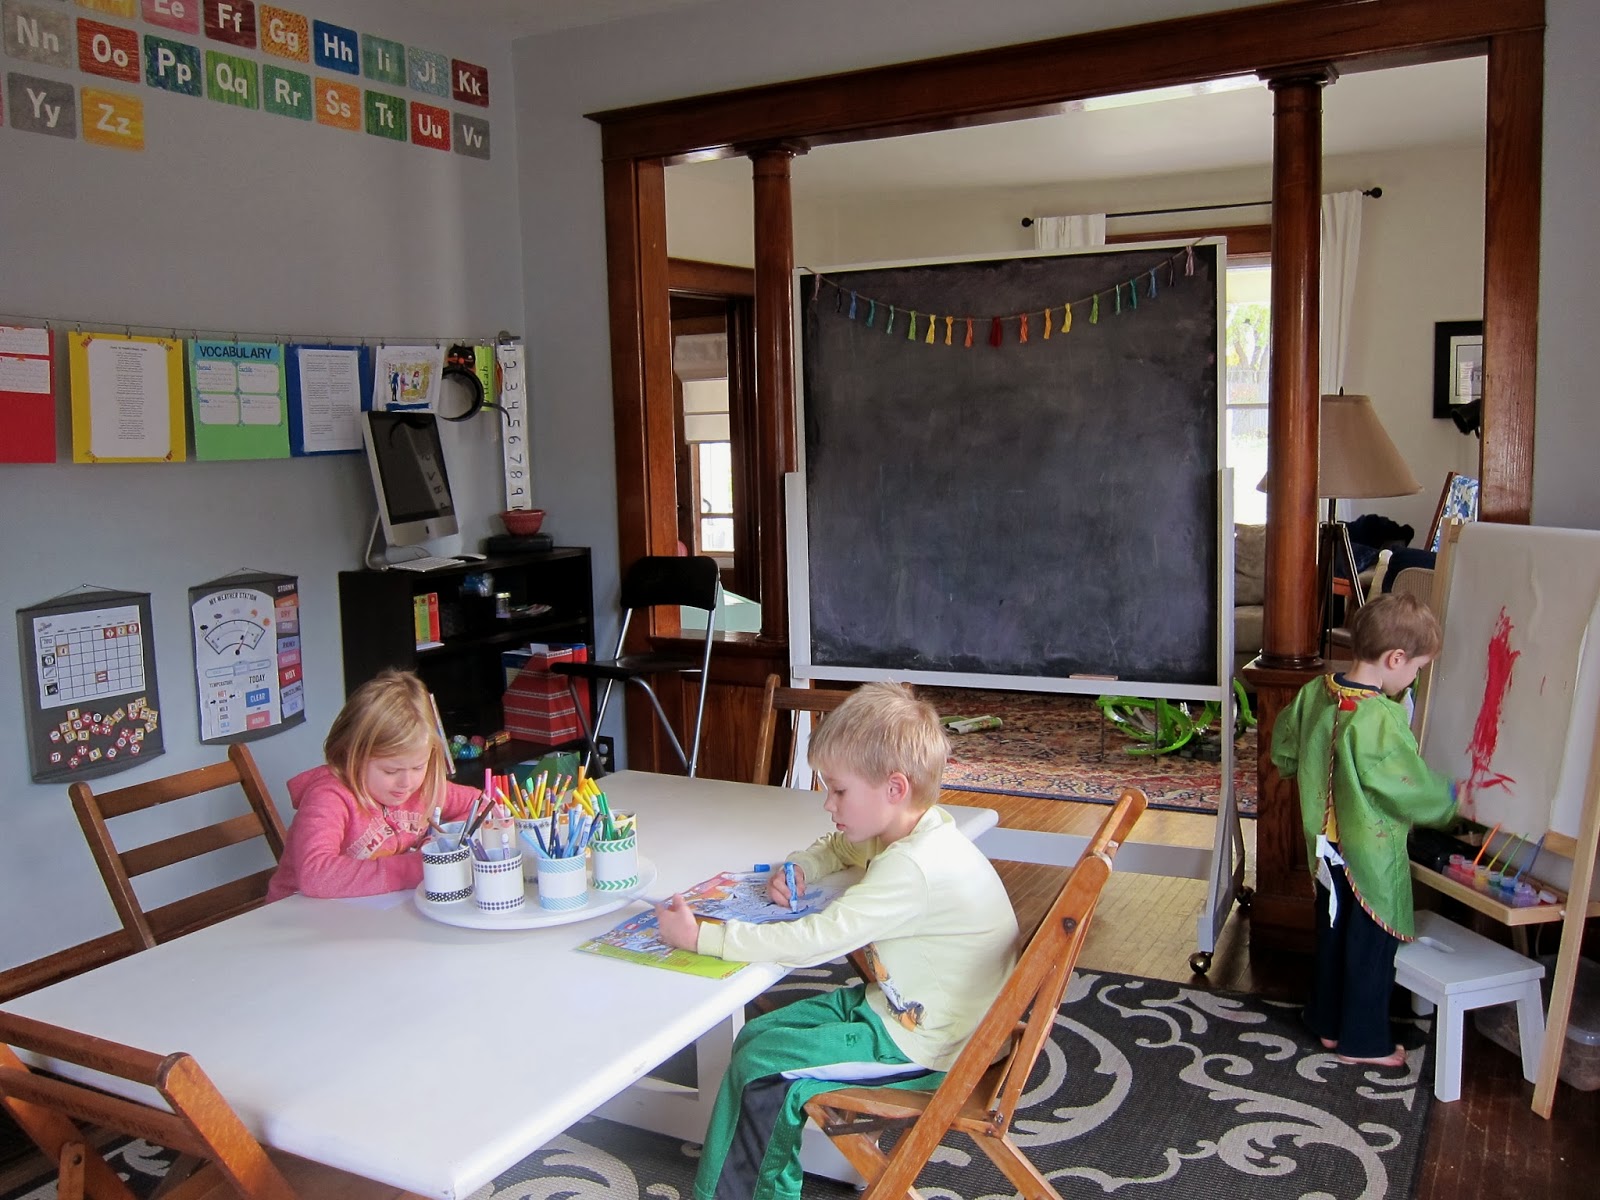
Jeremy built (altering this tutorial a little bit) the chalkboard for me for my birthday. During most of our school time we move it in-between the schoolroom and the living room. When we're finished with school we wheel it back to the east wall.

The east wall is also where we house our calendar and weather station.

In addition to our weather station also have a thermometer right outside one of our schoolroom windows.

In addition to the new chalkboard, we also invested in a few other new pieces. We previously had a adult size easel but it was a bit difficult for Little Lady (the one who enjoys painting the most) to utilize. We picked this easel up at Ikea for $15 and have been very happy with it.

The turquoise cart is also an Ikea find. We use it for art/craft supplies. It always has scrap paper, glue and scissors, but the rest are items I rotate: watercolors, pens, oil pastels, stencils, stamps, dot markers, paper punches, stickers, washi tape, etc, Above the cart, on the window, is where I display famous theme/subject related art.

The last new, Ikea addition to our school room is this white metal cabinet. We used to have a daybed in this spot but since the kids preferred the living room couch it didn't get much use. We ended up moving it onto the porch this summer. Having a cabinet with doors (that lock) in the school room has been a nice change. It gives me a place to store some of our more unsightly supplies as well as lock up items I want handy but out of the kids reach.
Since the cabinet is metal there is often magnets on it. Right now it's Magnetic Poetry for Kids.


On top of the cabinet is where we keep a rotation of science and nature materials. Underneath the cabinet is where we keep our microscopes; a nice one for Big Buddy to use and a thrift store find for the younger kids to play with.

The ladder baskets hold our school books and the the blue woven basket (old) stores free choice books. The suitcase is not just for decoration, it's a light table.

Here's a closer look at our very full shelves. The slim tower on the left contains jars full of crafting supplies like beads, buttons, foam stickers, etc.

On top of the shelves is paint and other messy art supplies. The books on the top shelf are favorites or teaching references. Then there are some rotating board games and puzzles. The two middle shelves on the left are our math shelves. There are manipulatives for Big Buddy to use along with his curriculum, as well as some activities for him and the younger children. The middle shelves on the right are our geography and history shelves. Directly under those shelves is our science shelf - mostly books, since the other items are on the cabinet. The remaining three shelves are manipulatives and games to help keep Mini Man and Little Lady busy.

The small shelf on the east wall with the computer is where all our language books and materials are kept. Hanging from the tension wire is a variety of things: recent child-art pieces, vocabulary, our monthly hymn, memorization work, etc.

I almost cleaned this window before taking pictures but decided to leave it since it's one of Mini Man and Little Lady's favorite activities. I think it's because coloring on the window feels a bit naughty but these window crayons are a saving grace somedays - they can always buy me ten minutes or so. If you are already looking for stocking stuffers, these are sure to be a hit.

Last update: I made the color carousel last year, but I just about a month ago I updated it with a bit of washi tape. The kids were delighted with the "make-over" and it makes me smile.

It is so gorgeous! What an amazing place to learn!
ReplyDeleteI love your classroom. My husband painted a wall in our dining room with chalkboard paint. I plan on turning our dining room into a makeshift classroom.
ReplyDeleteI love your space! Everything is so organized and neat plus has a very book-ish feel
ReplyDeleteGreat job!
happymedley.blogspot.com
As a book lover your comment made my heart very very happy ;)
DeleteWow! What a beautiful room!
ReplyDeleteWhat a great place to learn and grow. love the way you adapted the room and the diy projects. Thanks for the tour!
ReplyDeleteThanks Linda!
DeleteLovely ideas! I'm looking to do some changes around our school spaces, so you've provided me with a few ideas! Thank you!
ReplyDeleteGah! This is great!! Who couldn't learn here?!
ReplyDeleteOhhh this is just a dreamy space to see!!!! Wow!!! If I had the opportunity to build a room and fill it like this wow! It would really be a dream come true! From the mainly primary colored shelving displays against the black pow they just exude creativity for children, the windows oh goodness I adore the windows, the trim the wood trim adorning each entry way and door frame ... Oh be still my beating heart what a blessed home you have built there! What ai wouldn't give to make this for my own children. In any case, wow I wouldn't change a single piece! I'm in love with your space, right down to the original wood and super retro useful Pencil Sharpener!!! Thanks so much for letting us have a boo. I will use what I see as inspiration for additives around our apartment space to add more creative learning feel to it. Kindest thanks again, Jeanine ;)
ReplyDeleteThanks for stopping by Jeanine, and for your kind comment :)
Delete